A follow up on my previous work with crime by police beat, adding the ability to switch between beat and district. A district is a much larger area and changes the perception of the underlying data set.


A follow up on my previous work with crime by police beat, adding the ability to switch between beat and district. A district is a much larger area and changes the perception of the underlying data set.

Ever since my first programming experience with AutoLISP, the variant of the LISP language intended for automating AutoCAD, I had wanted to do data analytics again. I have used Javascript to process data, with the main disadvantage being that it is a very resource intensive method and not exactly what Javascript was intended for when it was developed. I had heard about the R language dedicated towards statistical analysis and decided a distributed approach was warranted: using R to process my data sets and create data files, and a web front end for actually displaying the data.
Initially my goal was use a React based visualization library, but after encountering issues with the only one in widespread use dedicated towards geographic JSON, I decided to use D3.js with React simply managing my interface state.

I began to actively look at the new implementation of Javascript, based on the ES6 spec, around June of 2016 after attending a related meetup about NodeJS. I had heard about languages like CoffeeScript that could compile to browser-compatible Javascript as well as tools like Babel for compiling ES6 to Javascript, but I had never touched any code with the newest spec until I started to explore the latest Javascript tutorials. That’s when I started to encounter unfamiliar syntax, even in tutorials with “vanilla” Javascript executed in the browser. At this point I became aware that the long awaited updates to the Javascript spec had made it into the browser engines.
The past few Javascript exercises sets I have done over the past year were exclusively pre-ES6 syntax, although sometimes I would end up using methods that had some support gaps, the string includes() method being one example (Internet Explorer did not embrace this method unlike most browsers). With all the advances in Javascript over the last few years, I felt that a newer approach was needed if I was going to brush up on the fundamentals while keeping up to date on new concepts.
My first exercise involved tying together keyboard input with audio output. One of the big advantages for string construction that I discovered here was variable interpolation. I found it much easier to place variables “inside” a string with delimiters compared to the old style of concatenating fragments and variables.
Old
“.my-section-class” + ” .” + propertyName
New
`.my-section-class .${propertyName}`
I had used Python string formatting before so the concept of embedding references in strings was familiar to me:
‘{} {}’.format(‘one’, ‘two’)
Once I was introduced to LESS styling I used variables as a matter of course, but in doing so I left exploration of CSS behind. Only recently did I use css variables in an exercise. After having used jQuery style functions for so long it was illuminating to see exactly how style can be manipulated with vanilla javascript.
Compared to changing styles via class changes I found that manipulating a variable inherited by other properties was much simpler. The result was replacing a chunk of code into functionality that is “under the hood”.
When it comes to processing data sets I have often used the Underscore library and it’s functions like map() and filter(). As part of my vanilla JS refresher I went back to the core Javascript functions for handling data sets. This is one area where the fat arrow (=>) started to demonstrate its benefits to me regarding concise code. Instead of having to deal with functions that returned booleans, I could rely on the implicitness of the syntax (return if true).
Before
const genX = castaways.filter(function(castaway) {if (castaway.year >= 1963 && castaway.year <= 1982){return true;}});
After
const genX = castaways.filter(castaway => castaway.year >= 1963 && castaway.year <= 1982);
In a way this makes code less human readable by putting more code into symbols. Also, it does look a little confusing to have an function call that looks like a comparison modifier. I will of course use it whenever appropriate, but I can understand people being puzzled by this new feature.
Reviewing the sort() function I decided to look into exactly how the comparison is done. I have read the basics on sorting algorithms in the past, so I decided to log the values being analyzed. Reviewing the purpose of the returns was a good refresher (1 to increase index, -1 to decrease index) and the end result was that sorting felt less like a black box.
The reduce() array function was one I hadn’t used in previous projects. At first glance it seems like a simple way to aggregate the data in an array and return a sum. This could be done with a a foreach() method, but as I read the documentation further I came to understand why the different array methods exist. Stepping back and taking a moment to look at the specifics of each method, the advantage of reduce (it returns an object or value) made it better suited for aggregation than a foreach() method since the accumulation is handled by the method itself. This contrasts with having separate variable and updating that during the iterations of a foreach().
After completing a React build using Webpack, I wanted to get back to the build system I had first used when I began web development, Gulp. My previous experience with Gulp was limited to minification and LESS compilation, two relatively straightforward processes. I quickly realized that creating a React build would require much more development as I needed to package a framework with all of the necessary dependencies
I found the declarative nature of Webpack appealing to the non-architecture developer that needs a build system without having to manually layout the entire process. However, in order to expand my knowledge I decided that proceeding with a Webpack build was insufficient. I decided to embark on switching my build system over to Gulp so I would have a balanced perspective on the pros and cons of each.
My initial experience with Webpack started with researching how to compile ES6 code for compatibility with older browsers. I had heard of Babel before and used the instructions there as the launching point for my previous Webpack build. My plan for Gulp was starting with the Babel instructions and proceeding from there. This is where the difference between Webpack and Gulp became readily apparent. With Webpack I didn’t need to specify anything other than the entry point to my app in the loader, and a fully compiled package was outputted. With Gulp I realized that transforming ES6 into older code was only part of the equation.
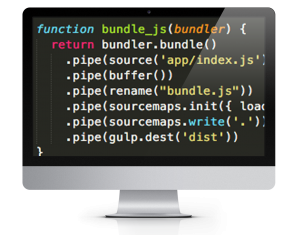
Seeking a system that would get me a complete Javascript bundle for the browser, I did searches on ReactJS builds. A lot of the results pointed to Webpack builds, but then I came across references to Browserify. I used RequireJS in combination with Backbone for creating structured Javascript applications; all the files remained where they were, however, and there was no build wth a resulting bundle. In the interest of reducing network calls, I wanted a system to package all my dependencies into a bundle so I investigated how to use Browserify to acheive this. The learning curve proved to be much steeper than Webpack but after reading about how to employ the Browserify Gulp module I learned about using transform(). This way I could package all my dependencies and then apply Babel using a Gulp plugin to create packaged and backwards-compliant Javascript.
var bundler = browserify({entries: [‘app/index.jsx’], debug: true}).transform(babelify);
After completing my initial Browserify build the next step was finding a watch system for file changes. I had used gulp-watch for LESS projects, but a companion module to Browserify called Watchify. The implementation was different from gulp-watch in that the Browserify call is passed to Watchify, as opposed to the typical Gulp flow that I’ve implemented before: piping data from one call to another. Instead of a pipe() I was surprised to see a call resembling a jQuery event listener .on() declaration. Overall, Watchify reminded me of Webpack’s build system a bit in that the actual mechanics are somewhat obfuscated.
gulp.task(‘watchify’, function () {var args = merge(watchify.args, { debug: true })var bundler = watchify(browserify(‘app/index.jsx’, args)).transform(babelify)bundle_js(bundler)bundler.on(‘update’, function () {bundle_js(bundler)})})
Having Watchify take care of monitoring the build source and triggered a new Browserify bundle was all well and good, but I disliked the number of requirements I was introducing into my application at this point. I decided to switch to a standard gulp-watch for the sake of simplicity. Diving into the pros and cons of Watchify vs gulp-watch, I would sum up my takeaway as a matter of efficiency versus simplicity. With Watchify there is a focus on only loading what has changed and building incrementally; Gulp watch is focused on simply looking for file changes and then executing the same build process over and over again.
While my LESS and Javascript compilation process had produced properly bundled JS and CSS files, I found that when I tried debugging my styles the LESS files in the browser were empty despite having used the gulp-less-sourcemaps plugin to compile my LESS. It then occurred to me that I have used gulp-sourcemaps in conjunction with the Browserify DEBUG mode to compile my JSX. Reading into the mechanism by which gulp-sourcemaps operated I discovered that I could also use it for mapping my CSS to the original LESS files. I therefore ditched gulp-less-sourcemaps in favour of the the aforementioned general mapping plugin combined with gulp-less. While I added more top level dependencies into my gulpfile, the end result is the same.
Before
gulp.task(‘compile-less’, function () {gulp.src(‘app/styles/app.less’).pipe(less({sourceMap: {sourceMapRootpath: ” // Optional absolute or relative path to your LESS files}})).pipe(gulp.dest(“dist/styles”));});
After
gulp.task(‘compile-less’, function () {gulp.src(‘app/styles/app.less’).pipe(sourcemaps.init()).pipe(less()).pipe(sourcemaps.write(“.”)).pipe(gulp.dest(“dist/styles”));});
Compared to Webpack, Gulp was a much more down and dirty way of setting up a React build. The task of assembling all the different gulp modules made it much more challenging than Webpack’s declarative based configuration. Personally, I can understand why a lot of the top results for React builds used Webpack instead of Gulp. Ultimately the choice of build system will of course depend on what people use in their organizations or what people they are collaborating with are using.

Wireframes
Lighting and Material
Random Space
Boundaries
Warp Speed away
Improved Warp Speed
Rail game background
Github
The goal with this exercise was to learn the basics on how to create a 3D scene with geometry. I became familiar with the concept of meshes being composed of a geometry and a material, which are then added to the SCENE object for rendering. I used an Object to store the initial meshes, then added them to an Object3D; I later refined my approach once I understood how to properly employ the different container elements.
The basic wireframe approach involved creating a SCENE, CAMERA, and a renderer (which combines a SCENE and CAMERA to create what appears in the CANVAS element in HTML5). After that, I used a loop to create multiple MESHES using a Cube and a basic mesh material from ThreeJS. The last component was to create an animation cycle to move the group of boxes back and forth. This was done by putting a function to create movement inside of the render function (which behaves as a loop running at 60 FPS).
Once I understood the fundamentals of creating geometry and animation, I went back and made the cubes solid. This required using a Lambert material for the mesh with flat shading, in contrast to the basic material with wireframe. To complete the scene I needed some light for the material to receive so that the cubes would be visible, so I created some directional lights which got me familiar with those elements.
This exercise was an extension of the shaded cubes, where I wanted to see just how much I could push the capabilities of the webGL engine. I brought the size of the cubes down dramatically and increased the creation loop so that 10,000 cubes would be generated. The goal was to get an sense of the number and size required in order to create a dense field of objects. I decided to use small cubes since they would be easier to render than spheres, and because the size of the elements I wanted in the scene didn’t really justify using spheres. Make the cubes small enough and the casual eye would not be able to tell the difference.
I decided to combine the bouncing between boundaries action of the wireframe exercise with the random star field to help me get an idea of the change in performance if I animated a large number of objects in the scene at once. The results were somewhat predictable; despite the simplicity of the objects in the scene, having thousands of elements to animate sapped the processing strength out of my older processor. This experience made me somewhat wary of using ThreeJS for incredibly complex concepts I had since there would undoubtedly be limits from a performance standpoint on who could enjoy it, in addition to any incompatibilities with browser support.
Ever since I stopped needing to use the screen saver program After Dark I had missed the warp speed screen saver and decided that ThreeJS would provide a good opportunity to recreate it and learn about how to manage a scene. Using the star field boundary example I changed it so that the star field would come towards the viewer and then disappear. The entire star field was generated, rendered and animated in one go. The downside of this approach became apparent quite quickly so I set about rewriting the code to continuously generate stars and animate them.
The distribution of the stars during the animation ended up being uneven, which I set out to address when recreating the scene. Since the entire star field was rendered and then animated as one unit, the scene would have motion but lack a sense of dynamics. Before I decided to implement a continuous random star generator I toyed with the idea of creating the warp speed effect by creating star field groups one after the other. The problem with that approach is that having to wait for an entire group to clear the camera before it was disposed of would inflict a big performance drag. Just as one should endeavour to write as little code as possible to accomplish a task, I realized that as few objects as possible needed to be rendered in the scene.
My improvement to the warp speed prototype was to make a new creation function that contained the loop for generating stars. I also finally dispensed with the unnecessary intermediate step of storing the references to the meshes in an Object and then adding that to an Object3D. Now I had a function that would generate ten stars randomly every time it was called. I placed this function call in the render loop, resulting in about 600 stars being randomly generated a second. I disposed of unwanted stars that had moved out of frame by setting a cutoff point on the z-axis, after which a star would be removed from the Object3D being rendered.
The resulting scene ended up being a lot less dense than my previous examples, but an ideal warp speed simulation with a continuous stream of stars. There is a distinct twinkling in the center of the simulation, a result of the distant box that the stars are created within. This could be reduced by moving the area where the stars are born farther back from the camera, but this would have a downside since there would be more objects in the scene at one time causing performance drag.
Once I had mastered how to animate, generate, and dispose of objects properly I adapted the warp speed simulation to function as a background for a rail space shooter where a ship ‘moves’ by having the background move from right to left. This required altering the code to randomly create stars in an imaginary box to the right of the camera. The disposal line was also changed to slightly off camera left.

Babel and Webpack
Source Map
Watching files
Serving content
Modularize code
Adding input
Styling
CSS on it’s own
LESS source maps
Conclusion
This time around I decided to build a project from the ground up including my own choice of build system. I had used Gulp in previous projects for basic tasks such as JS and CSS minification as well as LESS compilation. Hearing about people using Webpack on other projects, I decided to look into using this system especially since I would be using Babel to convert my JSX and ES6 code.
The first difference I noticed when constructing a Webpack config compared to Gulp was the setting oriented nature of the file. With Gulp I was accustomed to specifying a chain of commands for a task, but with Webpack the workflow felt more “object based” than “function based”. This is a preliminary observation based on a basic setup, of course, but made Webpack distinctive to me nonetheless.
I have never used source maps as part of my development work before I started coding with React framework. The main reasons were A) wasn’t aware of their purpose before and B) had no need for them even if I had been aware. Most of my Javascript work before had been with frameworks and MVC libraries like Backbone and VueJS. These all involved compilation and package management to various degrees but left the code fundamentally unaltered from the source files.
I quickly realized that tracing bugs in React compiled code back to the original JSX files would be cumbersome. This is when the concept of the source map came to my attention. It was surprisingly easy to add source map creation in Webpack with just one command:
devtool: ‘source-map’
My next challenge was figuring out how to speed up the development process so that I would not have to invoke the Webpack build process using the command line every time I made a file change. With Gulp I was familiar with the concept of watchers that trigger Gulp tasks whenever file changes are made. Given Webpack’s settings approach I came back to the command line and introduced myself to the watch functionality.
webpack –watch
The method above worked well for compiling the static JS, but the matter of serving the files still remained. For simple projects I generally use the basic Python http server.
python -m SimpleHTTPServer 8080
The Webpack dev server, on the other hand, appealed to me since I could take care of compiling, serving content, and refreshing the browser in one package.
Based on my previous framework experience, I decided to split my code up into separate files right away. This was another case where the difference between Webpack and Gulp became apparent. With Gulp I was accustomed to specifying a catch all path to scoop up all the files in a directory for processing. With Webpack, on the other hand, I found that additional configuration was unnecessary; the imports were all picked up automatically by the compiler.
After splitting my code into modules, I decided the next step would be connecting input to output. In order to accomplish this I created a new module for form inputs and made a TextInput component. I placed a callback in my project base and passed it into the TextInput component. This allowed me to change the application state from the TextInput module and automatically display the latest data on my app’s homepage.
updateUserName(name){this.setState({“user”: name.target.value});}<input type=”text” onChange={this.updateUserName}/>
After getting a basic site structure built, it was time to learn how to set up the styling system. I have used a lot of different CSS processors and LESS is still my favourite one. Configuring LESS in Webpack proved to be more complex than Gulp, however. This was one of the cases where I needed to fall back on the documentation extensively.
The first step was getting styles to show up on the page using the simplest method possible. I used the Webpack less-loader to accomplish this.
{test: /\.less$/,loader: “style!css!less”}
The downside of this approach is that it bundles the LESS as CSS code inside of the Javascript instead of a separate stylesheet. For my next step I aimed to place my generated CSS outside of the bundled JS to allow for source mapping of the CSS to the original LESS.
To get the CSS into it’s own file, I was introduced to the concept of extracting data from the bundle. I eventually settled on using the ExtractTextPlugin.
loader:ExtractTextPlugin.extract(“style-loader”,”css-loader!less-loader”),
This step seemed somewhat counterintuitive to me, since Webpack is bundling all of the code only to have some of it extracted for styling purposes. With Gulp I was accustomed to have different processes for handling JS and CSS tasks.
When I first started using LESS I wanted to incorporate Bootstrap as I had done with plain CSS styled sites. This is when I first encountered the issue of debugging compiled styles. Searching for declarations or comments in the compiled css and then trying to find them in the LESS files could get quite tedious. As started previously, source maps came to my attention when working with Javascript, but I started to wonder if they were possible with other files.
As I’ve come to except from Webpack, adding source map support was simply a matter of adding a setting to the loader specification: sourcemap.
{test: /\.less$/,exclude: /node_modules/,loader: ExtractTextPlugin.extract(“style-loader?sourceMap”, “css-loader? sourceMap!autoprefixer? browsers=last 5 version!less-loader?sourceMap”),},
The one downside that I’ve countered so far is that CSS to LESS mappings appear to be specific only to the top-most selector, which means I could have a selector 100 lines down in the LESS while the mapping points to the parent selector on line 3. This is only my first observation of mappings of course, which I know from using JSX -> JS can vary in precision.
After having used Gulp to automate simple build processes and Webpack for React JS, my opinion is that while Gulp may require more skill when it comes to crafting the build process with all the methods involved it is still easier for me to understand. Webpack processes, on the other hand, felt more obfuscated behind the declarative nature of the configuration.
For my next experiment I want to switch my build system over to a Gulp process while maintaining my current compiled output (JS and CSS).


