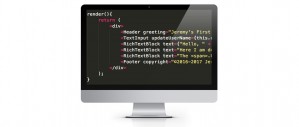
Computer screen with Gulp file

Changing the React-ion

After completing a React build using Webpack, I wanted to get back to the build system I had first used when I began web development, Gulp. My previous experience with Gulp was limited to minification and LESS compilation, two relatively straightforward processes. I quickly realized that creating a React build would require much more development as I needed to package a framework with all of the necessary dependencies

Outline

Decision to switch to Gulp
Basic Babel
Addressing the incomplete bundle
Keeping a watch-ify
gulp-watch vs. watchify
Mapping LESS and Javascript correctly
Conclusion

Decision to switch to Gulp

I found the declarative nature of Webpack appealing to the non-architecture developer that needs a build system without having to manually layout the entire process. However, in order to expand my knowledge I decided that proceeding with a Webpack build was insufficient. I decided to embark on switching my build system over to Gulp so I would have a balanced perspective on the pros and cons of each.

Basic Babel

My initial experience with Webpack started with researching how to compile ES6 code for compatibility with older browsers. I had heard of Babel before and used the instructions there as the launching point for my previous Webpack build. My plan for Gulp was starting with the Babel instructions and proceeding from there. This is where the difference between Webpack and Gulp became readily apparent. With Webpack I didn’t need to specify anything other than the entry point to my app in the loader, and a fully compiled package was outputted. With Gulp I realized that transforming ES6 into older code was only part of the equation.

Addressing the incomplete bundle

Seeking a system that would get me a complete Javascript bundle for the browser, I did searches on ReactJS builds. A lot of the results pointed to Webpack builds, but then I came across references to Browserify. I used RequireJS in combination with Backbone for creating structured Javascript applications; all the files remained where they were, however, and there was no build wth a resulting bundle. In the interest of reducing network calls, I wanted a system to package all my dependencies into a bundle so I investigated how to use Browserify to acheive this. The learning curve proved to be much steeper than Webpack but after reading about how to employ the Browserify Gulp module I learned about using transform(). This way I could package all my dependencies and then apply Babel using a Gulp plugin to create packaged and backwards-compliant Javascript.

var bundler = browserify({entries: [‘app/index.jsx’], debug: true}).transform(babelify);

Keeping a watch-ify

After completing my initial Browserify build the next step was finding a watch system for file changes. I had used gulp-watch for LESS projects, but a companion module to Browserify called Watchify. The implementation was different from gulp-watch in that the Browserify call is passed to Watchify, as opposed to the typical Gulp flow that I’ve implemented before: piping data from one call to another. Instead of a pipe() I was surprised to see a call resembling a jQuery event listener .on() declaration. Overall, Watchify reminded me of Webpack’s build system a bit in that the actual mechanics are somewhat obfuscated.

gulp.task(‘watchify’, function () {
    var args = merge(watchify.args, { debug: true })
    var bundler = watchify(browserify(‘app/index.jsx’, args)).transform(babelify)
    bundle_js(bundler)
    bundler.on(‘update’, function () {
        bundle_js(bundler)
    })
})

gulp-watch vs. watchify

Having Watchify take care of monitoring the build source and triggered a new Browserify bundle was all well and good, but I disliked the number of requirements I was introducing into my application at this point. I decided to switch to a standard gulp-watch for the sake of simplicity. Diving into the pros and cons of Watchify vs gulp-watch, I would sum up my takeaway as a matter of efficiency versus simplicity. With Watchify there is a focus on only loading what has changed and building incrementally; Gulp watch is focused on simply looking for file changes and then executing the same build process over and over again.

Mapping LESS and Javascript correctly

While my LESS and Javascript compilation process had produced properly bundled JS and CSS files, I found that when I tried debugging my styles the LESS files in the browser were empty despite having used the gulp-less-sourcemaps plugin to compile my LESS. It then occurred to me that I have used gulp-sourcemaps in conjunction with the Browserify DEBUG mode to compile my JSX. Reading into the mechanism by which gulp-sourcemaps operated I discovered that I could also use it for mapping my CSS to the original LESS files. I therefore ditched gulp-less-sourcemaps in favour of the the aforementioned general mapping plugin combined with gulp-less. While I added more top level dependencies into my gulpfile, the end result is the same.


Before

gulp.task(‘compile-less’, function () {
     gulp.src(‘app/styles/app.less’)
          .pipe(less({
          sourceMap: {
               sourceMapRootpath: ” // Optional absolute or relative path to your LESS files
               }
          }))
          .pipe(gulp.dest(“dist/styles”));
});

After

gulp.task(‘compile-less’, function () {
     gulp.src(‘app/styles/app.less’)
          .pipe(sourcemaps.init())
          .pipe(less())
          .pipe(sourcemaps.write(“.”))
          .pipe(gulp.dest(“dist/styles”));
});

Conclusion

Compared to Webpack, Gulp was a much more down and dirty way of setting up a React build. The task of assembling all the different gulp modules made it much more challenging than Webpack’s declarative based configuration. Personally, I can understand why a lot of the top results for React builds used Webpack instead of Gulp. Ultimately the choice of build system will of course depend on what people use in their organizations or what people they are collaborating with are using.

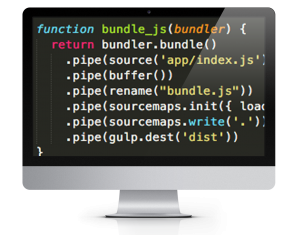
 

Computer screen with code snippet

Initiating my own React-ion

Diving into ReactJS, I began with a recommendation to check out a course by Wes Bos. After doing the tutorials, I decided to take a different approach to prototyping than the one I took when I first developed with MeteorJS. My Meteor experience involved taking a tutorial I had done and using that as a launching pad for a Twitter parser. In the following post I describe the highlights of how I got a React build working from scratch based on the documentation. At the end of some sections I have provided a link to the Github branch so you can see the state of the code at that point.

Outline

Babel and Webpack
Source Map
Watching files
Serving content
Modularize code
Adding input
Styling
CSS on it’s own
LESS source maps
Conclusion

Babel and Webpack

This time around I decided to build a project from the ground up including my own choice of build system. I had used Gulp in previous projects for basic tasks such as JS and CSS minification as well as LESS compilation. Hearing about people using Webpack on other projects, I decided to look into using this system especially since I would be using Babel to convert my JSX and ES6 code.

The first difference I noticed when constructing a Webpack config compared to Gulp was the setting oriented nature of the file. With Gulp I was accustomed to specifying a chain of commands for a task, but with Webpack the workflow felt more “object based” than “function based”. This is a preliminary observation based on a basic setup, of course, but made Webpack distinctive to me nonetheless.

Code here

Source map

I have never used source maps as part of my development work before I started coding with React framework. The main reasons were A) wasn’t aware of their purpose before and B) had no need for them even if I had been aware. Most of my Javascript work before had been with frameworks and MVC libraries like Backbone and VueJS. These all involved compilation and package management to various degrees but left the code fundamentally unaltered from the source files.

I quickly realized that tracing bugs in React compiled code back to the original JSX files would be cumbersome. This is when the concept of the source map came to my attention. It was surprisingly easy to add source map creation in Webpack with just one command:

devtool: ‘source-map’

Watching files

My next challenge was figuring out how to speed up the development process so that I would not have to invoke the Webpack build process using the command line every time I made a file change. With Gulp I was familiar with the concept of watchers that trigger Gulp tasks whenever file changes are made. Given Webpack’s settings approach I came back to the command line and introduced myself to the watch functionality.

webpack –watch

Serving content 

The method above worked well for compiling the static JS, but the matter of serving the files still remained. For simple projects I generally use the basic Python http server.

python -m SimpleHTTPServer 8080

The Webpack dev server, on the other hand, appealed to me since I could take care of compiling, serving content, and refreshing the browser in one package.

Code here

Modularize code

Based on my previous framework experience, I decided to split my code up into separate files right away. This was another case where the difference between Webpack and Gulp became apparent. With Gulp I was accustomed to specifying a catch all path to scoop up all the files in a directory for processing. With Webpack, on the other hand, I found that additional configuration was unnecessary; the imports were all picked up automatically by the compiler.

Code here

Adding input

After splitting my code into modules, I decided the next step would be connecting input to output. In order to accomplish this I created a new module for form inputs and made a TextInput component. I placed a callback in my project base and passed it into the TextInput component. This allowed me to change the application state from the TextInput module and automatically display the latest data on my app’s homepage.

updateUserName(name){
    this.setState({“user”: name.target.value});
}
<input type=”text” onChange={this.updateUserName}/>

Styling

After getting a basic site structure built, it was time to learn how to set up the styling system. I have used a lot of different CSS processors and LESS is still my favourite one. Configuring LESS in Webpack proved to be more complex than Gulp, however. This was one of the cases where I needed to fall back on the documentation extensively.

The first step was getting styles to show up on the page using the simplest method possible. I used the Webpack less-loader to accomplish this.

{
    test: /\.less$/,
    loader: “style!css!less”
}

The downside of this approach is that it bundles the LESS as CSS code inside of the Javascript instead of a separate stylesheet. For my next step I aimed to place my generated CSS outside of the bundled JS to allow for source mapping of the CSS to the original LESS.

Code here

CSS on it’s own

To get the CSS into it’s own file, I was introduced to the concept of extracting data from the bundle. I eventually settled on using the ExtractTextPlugin.

loader:ExtractTextPlugin.extract(“style-loader”,”css-loader!less-loader”),

This step seemed somewhat counterintuitive to me, since Webpack is bundling all of the code only to have some of it extracted for styling purposes. With Gulp I was accustomed to have different processes for handling JS and CSS tasks.

Code here

LESS source maps

When I first started using LESS I wanted to incorporate Bootstrap as I had done with plain CSS styled sites. This is when I first encountered the issue of debugging compiled styles. Searching for declarations or comments in the compiled css and then trying to find them in the LESS files could get quite tedious. As started previously, source maps came to my attention when working with Javascript, but I started to wonder if they were possible with other files.

As I’ve come to except from Webpack, adding source map support was simply a matter of adding a setting to the loader specification: sourcemap.

{
    test: /\.less$/,
    exclude: /node_modules/,
    loader: ExtractTextPlugin.extract(“style-loader?sourceMap”, “css-loader? sourceMap!autoprefixer? browsers=last 5 version!less-loader?sourceMap”),
},

The one downside that I’ve countered so far is that CSS to LESS mappings appear to be specific only to the top-most selector, which means I could have a selector 100 lines down in the LESS while the mapping points to the parent selector on line 3. This is only my first observation of mappings of course, which I know from using JSX -> JS can vary in precision.

Code here

Conclusion 

After having used Gulp to automate simple build processes and Webpack for React JS, my opinion is that while Gulp may require more skill when it comes to crafting the build process with all the methods involved it is still easier for me to understand. Webpack processes, on the other hand, felt more obfuscated behind the declarative nature of the configuration.

For my next experiment I want to switch my build system over to a Gulp process while maintaining my current compiled output (JS and CSS).