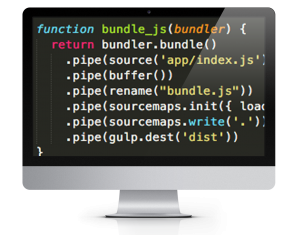
After completing a React build using Webpack, I wanted to get back to the build system I had first used when I began web development, Gulp. My previous experience with Gulp was limited to minification and LESS compilation, two relatively straightforward processes. I quickly realized that creating a React build would require much more development as I needed to package a framework with all of the necessary dependencies
Outline
Basic Babel
Addressing the incomplete bundle
Keeping a watch-ify
gulp-watch vs. watchify
Mapping LESS and Javascript correctly
Conclusion
Decision to switch to Gulp
I found the declarative nature of Webpack appealing to the non-architecture developer that needs a build system without having to manually layout the entire process. However, in order to expand my knowledge I decided that proceeding with a Webpack build was insufficient. I decided to embark on switching my build system over to Gulp so I would have a balanced perspective on the pros and cons of each.
Basic Babel
My initial experience with Webpack started with researching how to compile ES6 code for compatibility with older browsers. I had heard of Babel before and used the instructions there as the launching point for my previous Webpack build. My plan for Gulp was starting with the Babel instructions and proceeding from there. This is where the difference between Webpack and Gulp became readily apparent. With Webpack I didn’t need to specify anything other than the entry point to my app in the loader, and a fully compiled package was outputted. With Gulp I realized that transforming ES6 into older code was only part of the equation.
Addressing the incomplete bundle
Seeking a system that would get me a complete Javascript bundle for the browser, I did searches on ReactJS builds. A lot of the results pointed to Webpack builds, but then I came across references to Browserify. I used RequireJS in combination with Backbone for creating structured Javascript applications; all the files remained where they were, however, and there was no build wth a resulting bundle. In the interest of reducing network calls, I wanted a system to package all my dependencies into a bundle so I investigated how to use Browserify to acheive this. The learning curve proved to be much steeper than Webpack but after reading about how to employ the Browserify Gulp module I learned about using transform(). This way I could package all my dependencies and then apply Babel using a Gulp plugin to create packaged and backwards-compliant Javascript.
var bundler = browserify({entries: [‘app/index.jsx’], debug: true}).transform(babelify);
Keeping a watch-ify
After completing my initial Browserify build the next step was finding a watch system for file changes. I had used gulp-watch for LESS projects, but a companion module to Browserify called Watchify. The implementation was different from gulp-watch in that the Browserify call is passed to Watchify, as opposed to the typical Gulp flow that I’ve implemented before: piping data from one call to another. Instead of a pipe() I was surprised to see a call resembling a jQuery event listener .on() declaration. Overall, Watchify reminded me of Webpack’s build system a bit in that the actual mechanics are somewhat obfuscated.
gulp.task(‘watchify’, function () {var args = merge(watchify.args, { debug: true })var bundler = watchify(browserify(‘app/index.jsx’, args)).transform(babelify)bundle_js(bundler)bundler.on(‘update’, function () {bundle_js(bundler)})})
gulp-watch vs. watchify
Having Watchify take care of monitoring the build source and triggered a new Browserify bundle was all well and good, but I disliked the number of requirements I was introducing into my application at this point. I decided to switch to a standard gulp-watch for the sake of simplicity. Diving into the pros and cons of Watchify vs gulp-watch, I would sum up my takeaway as a matter of efficiency versus simplicity. With Watchify there is a focus on only loading what has changed and building incrementally; Gulp watch is focused on simply looking for file changes and then executing the same build process over and over again.
Mapping LESS and Javascript correctly
While my LESS and Javascript compilation process had produced properly bundled JS and CSS files, I found that when I tried debugging my styles the LESS files in the browser were empty despite having used the gulp-less-sourcemaps plugin to compile my LESS. It then occurred to me that I have used gulp-sourcemaps in conjunction with the Browserify DEBUG mode to compile my JSX. Reading into the mechanism by which gulp-sourcemaps operated I discovered that I could also use it for mapping my CSS to the original LESS files. I therefore ditched gulp-less-sourcemaps in favour of the the aforementioned general mapping plugin combined with gulp-less. While I added more top level dependencies into my gulpfile, the end result is the same.
Before
gulp.task(‘compile-less’, function () {gulp.src(‘app/styles/app.less’).pipe(less({sourceMap: {sourceMapRootpath: ” // Optional absolute or relative path to your LESS files}})).pipe(gulp.dest(“dist/styles”));});
After
gulp.task(‘compile-less’, function () {gulp.src(‘app/styles/app.less’).pipe(sourcemaps.init()).pipe(less()).pipe(sourcemaps.write(“.”)).pipe(gulp.dest(“dist/styles”));});
Conclusion
Compared to Webpack, Gulp was a much more down and dirty way of setting up a React build. The task of assembling all the different gulp modules made it much more challenging than Webpack’s declarative based configuration. Personally, I can understand why a lot of the top results for React builds used Webpack instead of Gulp. Ultimately the choice of build system will of course depend on what people use in their organizations or what people they are collaborating with are using.

