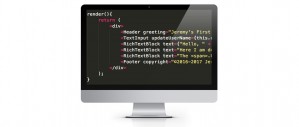
Computer screen with code snippet

Initiating my own React-ion

Diving into ReactJS, I began with a recommendation to check out a course by Wes Bos. After doing the tutorials, I decided to take a different approach to prototyping than the one I took when I first developed with MeteorJS. My Meteor experience involved taking a tutorial I had done and using that as a launching pad for a Twitter parser. In the following post I describe the highlights of how I got a React build working from scratch based on the documentation. At the end of some sections I have provided a link to the Github branch so you can see the state of the code at that point.

Outline

Babel and Webpack
Source Map
Watching files
Serving content
Modularize code
Adding input
Styling
CSS on it’s own
LESS source maps
Conclusion

Babel and Webpack

This time around I decided to build a project from the ground up including my own choice of build system. I had used Gulp in previous projects for basic tasks such as JS and CSS minification as well as LESS compilation. Hearing about people using Webpack on other projects, I decided to look into using this system especially since I would be using Babel to convert my JSX and ES6 code.

The first difference I noticed when constructing a Webpack config compared to Gulp was the setting oriented nature of the file. With Gulp I was accustomed to specifying a chain of commands for a task, but with Webpack the workflow felt more “object based” than “function based”. This is a preliminary observation based on a basic setup, of course, but made Webpack distinctive to me nonetheless.

Code here

Source map

I have never used source maps as part of my development work before I started coding with React framework. The main reasons were A) wasn’t aware of their purpose before and B) had no need for them even if I had been aware. Most of my Javascript work before had been with frameworks and MVC libraries like Backbone and VueJS. These all involved compilation and package management to various degrees but left the code fundamentally unaltered from the source files.

I quickly realized that tracing bugs in React compiled code back to the original JSX files would be cumbersome. This is when the concept of the source map came to my attention. It was surprisingly easy to add source map creation in Webpack with just one command:

devtool: ‘source-map’

Watching files

My next challenge was figuring out how to speed up the development process so that I would not have to invoke the Webpack build process using the command line every time I made a file change. With Gulp I was familiar with the concept of watchers that trigger Gulp tasks whenever file changes are made. Given Webpack’s settings approach I came back to the command line and introduced myself to the watch functionality.

webpack –watch

Serving content 

The method above worked well for compiling the static JS, but the matter of serving the files still remained. For simple projects I generally use the basic Python http server.

python -m SimpleHTTPServer 8080

The Webpack dev server, on the other hand, appealed to me since I could take care of compiling, serving content, and refreshing the browser in one package.

Code here

Modularize code

Based on my previous framework experience, I decided to split my code up into separate files right away. This was another case where the difference between Webpack and Gulp became apparent. With Gulp I was accustomed to specifying a catch all path to scoop up all the files in a directory for processing. With Webpack, on the other hand, I found that additional configuration was unnecessary; the imports were all picked up automatically by the compiler.

Code here

Adding input

After splitting my code into modules, I decided the next step would be connecting input to output. In order to accomplish this I created a new module for form inputs and made a TextInput component. I placed a callback in my project base and passed it into the TextInput component. This allowed me to change the application state from the TextInput module and automatically display the latest data on my app’s homepage.

updateUserName(name){
    this.setState({“user”: name.target.value});
}
<input type=”text” onChange={this.updateUserName}/>

Styling

After getting a basic site structure built, it was time to learn how to set up the styling system. I have used a lot of different CSS processors and LESS is still my favourite one. Configuring LESS in Webpack proved to be more complex than Gulp, however. This was one of the cases where I needed to fall back on the documentation extensively.

The first step was getting styles to show up on the page using the simplest method possible. I used the Webpack less-loader to accomplish this.

{
    test: /\.less$/,
    loader: “style!css!less”
}

The downside of this approach is that it bundles the LESS as CSS code inside of the Javascript instead of a separate stylesheet. For my next step I aimed to place my generated CSS outside of the bundled JS to allow for source mapping of the CSS to the original LESS.

Code here

CSS on it’s own

To get the CSS into it’s own file, I was introduced to the concept of extracting data from the bundle. I eventually settled on using the ExtractTextPlugin.

loader:ExtractTextPlugin.extract(“style-loader”,”css-loader!less-loader”),

This step seemed somewhat counterintuitive to me, since Webpack is bundling all of the code only to have some of it extracted for styling purposes. With Gulp I was accustomed to have different processes for handling JS and CSS tasks.

Code here

LESS source maps

When I first started using LESS I wanted to incorporate Bootstrap as I had done with plain CSS styled sites. This is when I first encountered the issue of debugging compiled styles. Searching for declarations or comments in the compiled css and then trying to find them in the LESS files could get quite tedious. As started previously, source maps came to my attention when working with Javascript, but I started to wonder if they were possible with other files.

As I’ve come to except from Webpack, adding source map support was simply a matter of adding a setting to the loader specification: sourcemap.

{
    test: /\.less$/,
    exclude: /node_modules/,
    loader: ExtractTextPlugin.extract(“style-loader?sourceMap”, “css-loader? sourceMap!autoprefixer? browsers=last 5 version!less-loader?sourceMap”),
},

The one downside that I’ve countered so far is that CSS to LESS mappings appear to be specific only to the top-most selector, which means I could have a selector 100 lines down in the LESS while the mapping points to the parent selector on line 3. This is only my first observation of mappings of course, which I know from using JSX -> JS can vary in precision.

Code here

Conclusion 

After having used Gulp to automate simple build processes and Webpack for React JS, my opinion is that while Gulp may require more skill when it comes to crafting the build process with all the methods involved it is still easier for me to understand. Webpack processes, on the other hand, felt more obfuscated behind the declarative nature of the configuration.

For my next experiment I want to switch my build system over to a Gulp process while maintaining my current compiled output (JS and CSS).

Canvas 3D

Canvas 3D Tutorial

Building on my experience with threeJS and simple simulations, I decided to do a tutorial on Canvas 3D using threeJS and webGL as a demonstration of new web technologies. The basic star field simulations I had completed before had given me a general understanding of the procedure for creating objects in Canvas 3D, and I decided to work with the other primitives as well as do basic physics. I decided that the deliverable would be a basic foundation for the Crazy Leap Pong game that I developed. It would serve as an ideal introduction to integrating threeJS, leapJS (for LEAP motion controller) and Node.JS.

The Crazy Leap Pong article addresses the programming that began with the scene created by the tutorial. This article aims to address the creation of the tutorial itself.

Outline

Tutorial: First Steps
Scripting
Silverback: Recording the Action
Editing
Presentation
Video
Github

Tutorial: First Steps

One of the first things I realized when creating the tutorial was that it was best to have a working prototype of the technology I wanted to demonstrate before I began recording. One of the worst things that can happen to any live demo is to have the end result fail (sometimes spectacularly). The same goes for a recorded demo; it would be an unnecessary loss of time to record a demo and then have the final threeJS simulation fail to perform according to expectations. I decided that the demo must work flawlessly before any recording could be done, and this was accomplished with little to no problems

Scripting

My initial tests with recording the tutorial demonstrated the need for me to have a script prepared beforehand. Attempting to do the demo in real time resulting in a lot of stumbling that would complicate the editing of the final product. Since I had already completed the code that would be presented during the tutorial, I decided that preparing all of my instructions and comments about the code would be prudent. The code was broken down into small pieces that I could record as inpidual segments which would then be edited together to make the final tutorial.


Silverback: Recording the Action

For screen recording, I decided to use an application for Mac OS X called Silverback. It is intended for user experience testing, capturing both the screen and the camera image. It does allow the export of footage without the user camera capture, which made it suitable for documenting the tutorial. One feature that I found beneficial was the mouse click point highlighting which helped keep track of actions of the screen during the presentation.

Editing

Given that my target length for the tutorial was approximately 10 minutes, it was inevitable that there was going to have to be a fair amount of footage needing to be cut after I finished recording. I ended up with 14 segments of footage in total with almost 12 minutes of length. Carefully reviewing my audio, I eliminated any unnecessarily long gaps in speech and anything else that would not adversely impact the understanding of the tutorial.

Presentation

Given that the text in the tutorial would have to be legible, it was necessary to encode at a fairly high bit rate and at a sufficient size. Uploading to Youtube, I ensured that the tutorial would have the option of being presented at 720p and full screen. In the near future, I would like to add captions to the video which will require examining the script and all the remarks in the video where the script was not followed word for word.

Tutorial Video

The tutorial is featured below and can be found on Youtube using this link

Github

The Github repository with the latest version of this project can be found here.

Gameplay

Crazy Leap Pong

This was a group project, on which I did nodeJS coding and threeJS coding for server and client side.

Outline

Initial Concept
Creating the game
Basic physics
Paddle control
Multiplayer Communication
Graphics
Paddle physics
Paddle graphics and sound
Screenshots
Github

Initial Concept

The Crazy Pong game using LeapJS, nodeJS and threeJS began with an exercise that I did in Canvas 3D. The goal of the exercise was to create a bounding box for a ball along with surfaces to show the limits of where it could bounce.

Originally, the goal of the group project was to use threeJS to translate 2D creations of monsters into 3D models, then have these models viewable using an Augmented Reality app. After working with nodeJS for some time, the group decided to focus attention on creating a 3D game designed for multiple players.

The decision to use Leap Motion as the input interface was one of prior experience with the technology and suitability in terms of the capabilities of the technology.

Creating the game

It was decided to take the ball court example that I had done for a Canvas 3D demonstration and adapt it into a full-fledged squash-like game. As development began, the following points were identified as milestones to achieve:

-Multiplayer communication: send the position of one player paddle to the other player

-Physics: the ball would have to bounce off the walls and the paddles, so collision detection would be crucial

-Graphics: the basic threeJS example that the game would be based on did not have lighting or shadow and did not have all the necessary geometry to create an immersive environment

-Connection: the game would have to wait to start instead of running on page load so players could get ready, so gathering the players together and figuring out the sequence of actions to actually begin the game would be a challenge

-Paddle control: moving a player’s own paddle, figuring out how to have the opposing player’s paddle move on screen and track the hits on both sides

Basic physics

The original Canvas 3D bouncing ball experiment used a simple physics engine based on rectilinear surfaces. Since a sphere will always hit a perfectly vertical or horizontal surface at its equator or pole(s) respectively, the bounce action would be a simple inversion along whatever axis the collision occurred. If a ball struck the bottom of our ball court while heading towards the player’s left, it would continue going left and towards the player, but its vertical speed would be reversed so it would then head up towards to the top.

Paddle control

Taking a previously completed basic exercise involving moving a cube in threeJS using Leap Motion, a control program was created for a player’s paddle. LeapJS by default creates a data collection loop when a new Leap controller instance is created, which then outputs an object multiple times per second with all the data that the Leap controller collects. Some of the data points that Leap registers include the position of all fingertips and hands that it can recognize.

The initial threeJS and Leap exercise used the position of one finger tip to control the cube on screen. For a squash game it was decided to use the position of a hand instead, so the previous code was adapted to track that type of position instead.

Multiplayer Communication

Multiplayer communication proved to be the biggest challenge in creating the game. The first task that was to start the initial connection, which would occur as soon as a player loaded the game’s webpage. The game would be hosted on a local nodeJS server instance, allowing client and server side code in Javascript. The basic concept of nodeJS is that clients send data to the node server, which then causes the node server to execute a particular program and send data back.

As soon as a player connected to the game site, there needed to be a program that would identify them. The socket or session ID which node generates whenever a connection is created (a connection can just be a tab in someone’s browser, not just a single computer connecting) was identified and assigned to a client ID generated server side. This was used to create a user map with user IDs associated with their connections.

The next challenge was figuring out how to create a map that associated a player with their opponent. This was accomplished by storing the client IDs which were the keys in the user map object in a temp array as soon as there were two clients, then creating another object which then stored a key/value pair where the key would be one client ID, and the value would be the other client ID in the game.

The objective of all this was to transmit any data received from one player to the other player only. NodeJS is built around ‘on’ events and ‘emit’ events. Every ‘emit’ event begins with a name identifying it followed by an object with data. On the server side, nodeJS listens to the emits and identifies the context of the emit, the fires the appropriate ‘on’ function.

During development it was decided that there would have to be a few core events after the initial connection. Both players would have to constantly broadcast the position of their paddle to the server. The server would then have to process the data and send it to the opponent.

Initial attempts to use the Leap data collection loop to send the position information of a person’s hand bogged down the server. The initial game design had the game begin as soon as two players connected; the server would send out an emit that would tell both players to start the programs that drew their environments and animated their bouncing balls. Instead of having the emit event for sending the hand position in the Leap loop an interval event was created so that the Leap variables would be sent at a predetermined frequency. This action resolved the server communication issues.

The next challenge after getting the data from each player’s Leap sent to the server was getting the data sent to the opponents. This was accomplished using the opponent map object that was created when each player connected. Normally, a simple emit would send data to all socket connections, but by specifying an extra destination socket parameter, data could be sent to a specific socket. Since two players would be sending data to the server, the function that received data would fire twice. Each time it fired, it would take the data received and identify the sender, then look up their opponent and send the data to that opponent’s socket.

Graphics

The basic concept behind the graphics of the game was to have a court so the bounding area of the ball would be visible. Initially, this consisted of two simple planes for the top and bottom with their edges showing the extents of the court. Our second iteration had vertical walls on the sides to create a tube; the ends were still empty at this point.

Getting all the wall surfaces to appear on screen was a challenge at first, but this was due to overlooking the fact that threeJS only places material on one side of a surface by default. In order to get light to bounce off a material and make an object visible, the material had to be explicitly assigned to all surfaces. Once this issue was solved, all surfaces appear properly.

The final iteration of the court graphics had the 3D camera inside of a cube with an omnidirectional light source. This made the graphics much simpler since there is only one object instead of four for the court.

Paddle physics

The initial bouncing ball tutorial that the game was based on specified the movement of the ball in the x,y, and z using randomly generated numbers. The ball would then move every frame according to the speed specified for each axis. However, when adapting the ball physics to multiplayer, it was realized that speed variables would have to be set server side, or else every client would be generating speed variables independently and the balls would not be synched. The necessary code was placed at the very beginning of the server side program, then sent to the players when they connected.

The basic physics limits consisted of bouncing the ball left or right if it exceeded the x position of either side of the court. The y and z limits applied to the top/bottom of the court and the ends respectively. Once this was accomplished, there was still the matter of bouncing the ball off of the paddles themselves.

In order to accomplish this, all of the physics are done locally leaving the server just for passing the paddle positions. The first step was to constantly check if the ball x position fell intersected with a paddle, the check if the y positions intersected, and then the z positions. If all the checks were positive, then a collision is registered and the ball is bounced off the paddle.

The physics engine for the paddles only works if the ball is coming towards the player, saving on processing time. We decided to ignore the ball if it bounced off the back wall; as a result, it will simply pass through the paddle from behind.

Paddle graphics and sound

To improve the UI, a sound effect was implemented on a successful hit instead of relying on the score updating to let someone know they scored. Also, the color of the paddle changes to green for both players when they’ve scored a hit, further improving the feedback when there is a hit.

The color of the paddle is replicated in the top-most banner of the game, where each player’s label reflects the paddle color. This was implemented so that the player could recognize which score reflected their game-play.

Screenshots

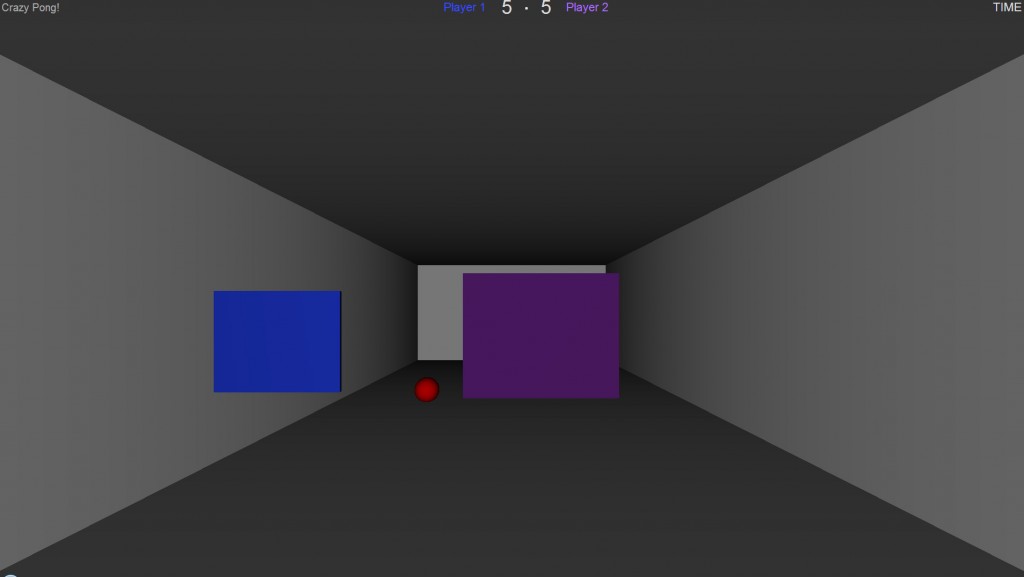
Shot of Crazy Pong gameplay

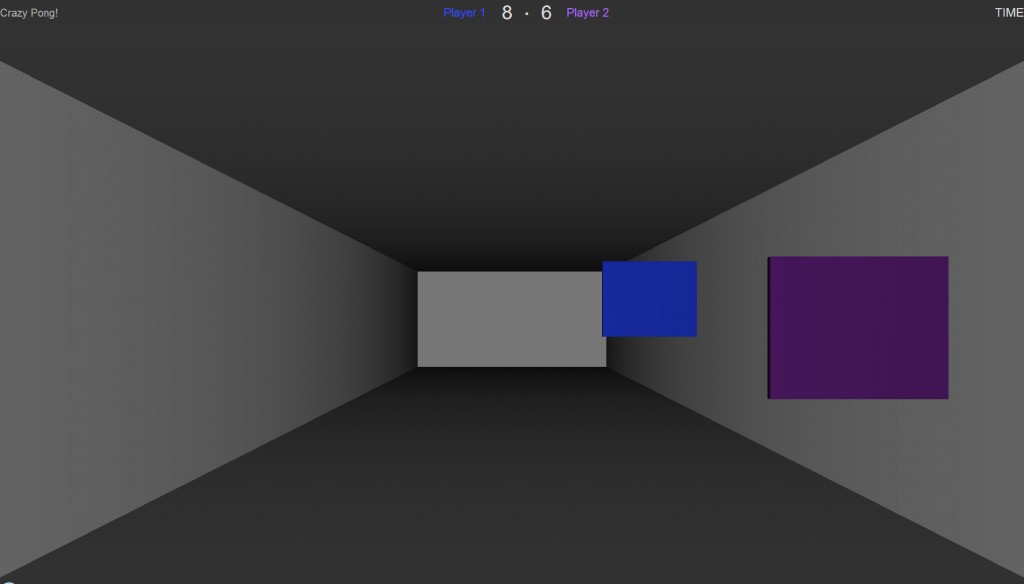
Another shot of game play

Github

The Github repository with the latest version of this project can be found here.

Singular: Getting into HTML5

This was my first big experiment with constructing a web page using the latest HTML5 conventions and tags such as “section” and “article”. The goal was to outline a site with the appropriate use of elements such as header and footer. I did a lot of research at sites such as HTML5 Doctor about how to properly use all the new ways to organize content on the web.

One of my tasks when I started working on this project was to take a hard look at how many sites are constructed. The “div” is still the bread and butter of many sites, some using incredibly nested document outlines with some elements over a dozen levels deep.

Each major section in the website is appropriately contained in a “section” element, and each article is an appropriate “article”. The user interaction for the site, however, used the familiar form element to create a submission.

I conceived my site as an example of a fictional business, and decided to use the form as a way for potential customers to submit info on what kind of services they are interested in. I took this opportunity to style a form which I had never done before, and use the new basic validation features in HTML5 to require certain formats and items to be completed.

AJAX List Manager

After some time doing database access using traditional PHP scripts and HTML forms, I began to learn AJAX so I could stay on the client side. I had done basic XML with the Flickr API, but it had still been one way on page load. Being able to update specific parts of a page with database information meant I could eventually learn to code my own photo galleries.

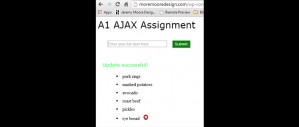
For this exercise, the goal was to make a list manager using AJAX. I had already done a Javascript driven list manager, but the information was temporary. There were three basic goals: insert a record, edit a record and delete a record. The insert and edit functions were easier than I anticipated, while the delete functionality proved to be much more challenging. One of the objectives was to recreate a certain UX, and manipulating the delete button to achieve the desired effect required a lot of trial and error. The end result was a tremendous learning experience revolving around the XML DOM.

Aggregator: A Social Media Hub

This was a social media app group project meant to aggregate different feeds, aptly named Aggregator. The fundamental aspect was to have one way to view Twitter, Instagram and Facebook content.

There were two tasks that the user had to be able to accomplish: filtering their feed so that only Twitter appeared and retweeting a tweet. The approach that my group took was to have the filtering ability up front and accessible as opposed to a user preference feature.

One UI lesson I learned from working on this project was how much people have gotten use to the conventions on the sites they currently use. Originally the plan was for every post, regardless of network, to have an action tab that would have all the actions (like, retweet, reply, etc). This unifying element proved to be divisive among the users that tested the paper prototypes. Users preferred to have the familiar layout for each social network’s post.